
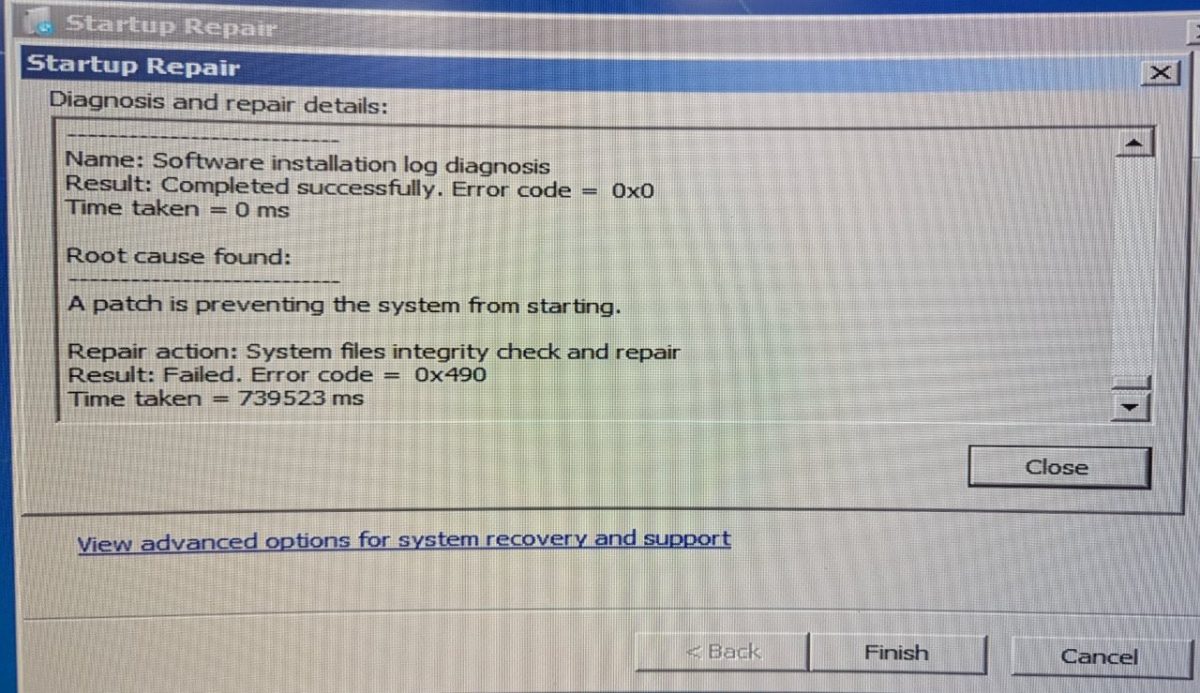
Restoring a Windows 7 disk image onto a computer with different hardware can result in a system that refuses to boot. Startup Repair may report:
Root cause found:
Name: Software installation log diagnosis
Result: Completed successfully
Error code = 0x0

A patch is preventing the system from starting

Repair action: System file integrity check and repair
Result: Failed
Error code = 0x490
The 0x0 result only means that the diagnostic step completed. It does not mean Windows was repaired. Error 0x490 is a general Startup Repair failure.
When the Windows image came from another computer, the most likely causes are:
- A different SATA or storage controller
- A missing storage-controller driver
- AHCI, IDE, or RAID mode not matching the original computer
- A Legacy BIOS/MBR versus UEFI/GPT mismatch
- An unfinished Windows update inside the restored image
- Boot files that still refer to the original disk layout
Before You Begin
Create another backup of the restored disk before changing partitions, registry settings, boot records, or drivers.
Also note that Windows 7 is no longer supported by Microsoft. This procedure may recover a legacy installation, but a supported operating system is strongly recommended for internet-connected use.
Best Method: Generalize the Image on the Original Computer
If the original computer still starts, the most reliable solution is to prepare Windows for different hardware before capturing the image.
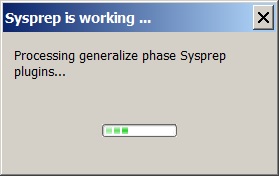
Start the original Windows 7 installation, open an elevated Command Prompt, and run:
C:\Windows\System32\Sysprep\Sysprep.exe /generalize /oobe /shutdownAfter the computer shuts down, do not start Windows normally again. Capture the disk image while the machine is shut down, restore it to the destination computer, and boot it there.
The /generalize option removes hardware-specific information so Windows can detect the new motherboard, storage controller, and other devices during its first startup.
After Windows starts, install the destination computer’s Windows 7 chipset, storage, network, and graphics drivers.
Repairing the Existing Restored Image
If recreating the image is not possible, work through the following steps in order.
1. Match the BIOS or Firmware Settings
Open the destination computer’s BIOS or firmware setup and check the following settings:
- Boot mode: A normal Windows 7 MBR installation usually needs Legacy BIOS or CSM mode.
- SATA mode: Try to match the source computer’s setting: AHCI, IDE/Compatibility, or RAID.
A wrong SATA mode often causes Windows to begin loading and then restart or display the blue-screen error STOP 0x0000007B.
Change one setting at a time and record the original values.
2. Open the Windows Recovery Command Prompt
Boot from a Windows 7 installation DVD or compatible Windows 7 repair disc. Select:
Repair your computer → Command Prompt
In the recovery environment, the Windows partition may not be assigned drive letter C:. Identify the partitions with:
diskpart
list volume
exit
Then test the likely drive letters:
dir C:\Windows
dir D:\Windows
dir E:\Windows
The remaining examples assume that Windows is installed on D:. Replace that letter with the correct one for your computer.
3. Check the File System
chkdsk D: /fThis repairs logical file-system errors. Avoid using /r initially unless you suspect physical disk damage, because a sector scan can take a very long time.
4. Cancel an Unfinished Windows Update
The repair report says that a patch may be preventing startup. Revert pending servicing operations with:
dism /image:D:\ /cleanup-image /revertpendingactionsRestart the computer once after this command completes.
Do not rely on the newer DISM /RestoreHealth procedure commonly used for Windows 10 and Windows 11. Windows 7 does not support it in the same way.
5. Repair Windows System Files Offline
Return to the recovery Command Prompt and run:
sfc /scannow /offbootdir=D:\ /offwindir=D:\WindowsIf the computer has a separate System Reserved partition, the /offbootdir value may need to point to that partition. For example, if System Reserved is C: and Windows is D:, use:
sfc /scannow /offbootdir=C:\ /offwindir=D:\Windows6. Repair the Boot Records
For a Legacy BIOS and MBR installation, run:
bootrec /fixmbr
bootrec /fixboot
bootrec /scanos
bootrec /rebuildbcd
If /rebuildbcd finds the Windows installation, press Y to add it.
If No Windows Installation Is Found
Identify the System Reserved partition and assign it a temporary drive letter:
diskpart
list disk
select disk 0
list partition
select partition N
active
assign letter=S
exit
Important: Use the active command only on an MBR/Legacy BIOS disk, and only on the partition that should contain the boot files. Selecting the wrong partition can prevent the system from starting.
Recreate the boot files with:
bcdboot D:\Windows /s S:If there is no System Reserved partition and the Windows partition itself is the active boot partition, use:
bcdboot D:\Windows /s D:7. Enable Windows 7’s Built-in Storage Drivers Offline
A Windows installation moved from another computer may have the driver required by the new SATA controller disabled.
Load the offline SYSTEM registry hive:
reg load HKLM\OfflineSystem D:\Windows\System32\Config\SYSTEM
reg query HKLM\OfflineSystem\Select
Check the value named Current. If it is 0x1, use ControlSet001. If it is 0x2, use ControlSet002.
For ControlSet001, enable the built-in Microsoft AHCI, IDE, and inbox RAID drivers:
reg add HKLM\OfflineSystem\ControlSet001\Services\msahci /v Start /t REG_DWORD /d 0 /f
reg add HKLM\OfflineSystem\ControlSet001\Services\pciide /v Start /t REG_DWORD /d 0 /f
reg add HKLM\OfflineSystem\ControlSet001\Services\iaStorV /v Start /t REG_DWORD /d 0 /f
reg unload HKLM\OfflineSystem
Restart and test the system.
8. Inject the Destination Computer’s Storage Driver
If the new motherboard uses a storage controller that Windows 7 does not support natively, download the appropriate Windows 7 SATA, AHCI, or RAID driver on another computer.
Extract the driver package. You need the actual .inf, .sys, and .cat files, not only a setup program.
If the extracted driver folder is on USB drive E:, inject it into the offline Windows installation with:
dism /image:D:\ /add-driver /driver:E:\StorageDriver /recurseRestart with the BIOS SATA mode that matches the injected driver.
This step is especially important when the destination computer uses newer Intel or AMD chipsets, NVMe storage, RAID controllers, or hardware manufactured well after Windows 7.
Display the Actual Blue-Screen Error
Press F8 before Windows starts and choose:
Disable automatic restart on system failure
The stop code can help identify the remaining problem:
0x0000007B: Storage controller, SATA mode, or storage driver problem0x000000A5: BIOS or ACPI incompatibility0x0000007Eor0x00000050: Often an incompatible driver- Continuous update or “reverting changes” messages: Pending servicing operation
Recommended Recovery Order
- Match the Legacy/UEFI and SATA settings.
- Run
chkdsk. - Run
DISM /RevertPendingActions. - Run offline
SFC. - Repair or recreate the boot files.
- Enable or inject the destination storage driver.
- If the system still does not start, generalize the image on the source computer and capture it again.
Conclusion
A restored Windows 7 image often fails on different hardware because the installed system still contains storage drivers, boot configuration, and hardware information from the original computer. Error 0x490 does not identify one specific fault, so the repair process must address pending updates, system files, boot records, firmware mode, and storage-controller drivers.
When possible, using Sysprep with /generalize before capturing the source image is substantially more reliable than repairing a hardware-specific clone after restoration.